Bikepacking on a budget: how to create a simple, smart setup
Fancy heading out for a bikepacking adventure but don’t want to spend a fortune on it? You don’t have to. Set yourself up for success with our guide to bikepacking on a budget.


If you’re a keen adventurer, you’ll definitely have come across some pristine bikepacking setups on social media. Don’t be alarmed – with smart planning, creative solutions, and strategic gear choices, you can embark on memorable adventures without breaking the bank. Expensive gear doesn't guarantee a better experience – preparation, knowledge, and making the most of what you have does.
Contents
Evaluate your current bike for bikepacking
Before delving further into that, let’s assess whether you can use the bike that you already have.
- Frame and mounting points: Check whether your existing bike has mounts or bolts for attaching racks, bottle cages, and bikepacking bags. Bikes with built-in mounts make gear attachment easier; otherwise, accessories like straps may be needed.
- Bike type and terrain compatibility: Consider the bike type. Mountain bikes and gravel bikes are often best due to wider tyre clearance and durability. Road bikes can work but may not handle rough terrain or wider tyres well.
- Tyre clearance and size: Ensure the bike can fit tyres suitable for the terrain. Wider tyres provide comfort and grip on rough surfaces, which is important for off-road bikepacking.
- Load capacity and weight distribution: Verify the bike frame and components can handle the added weight of gear and supplies. Properly balance the weight across your frame bags, handlebar bags, and seatpost packs for stability.
- Comfort and geometry: Consider the bike’s geometry for comfort over long distances. Some bikes may require adjustments or upgrades for better comfort on extended rides.
- Bike condition and maintenance: The bike should be in good mechanical condition and equipped with necessary repair tools for on-the-go fixes.
- Type of bikepacking trip: Gauge whether your current bike can work for your trip’s length, terrain, and remoteness.
Affordable bikepacking bike options at Canyon
For a fantastic budget road bike option within the Canyon range, check out the Endurace AllRoad. All the best parts of the Endurace range but with a very affordable price tag.
We know that having a good bike can make all the difference when you’re out in the wild, and our most popular bikepacking bike is the Grizl. Think of the wildest of the wild adventures – the Grizl can do it all. With all the suitable mounting points to allow for a pannier rack or additional storage options, this bike is perfect for bikepacking. There’s clearance of up to 54mm for putting it wider tyres that’ll keep you rolling through just about every terrain. For affordable options within this iconic range, check out the Grizl AL. Looking to mix the comfort of a gravel bike and the speed of a road bike? Check out the Grail.
For other affordable bikepacking bike options at Canyon, see if you can find a bike in your size available in the Canyon Outlet where there are often special offers on refurbished bikes or those from past seasons. You might also find it helpful to check out our guide on how to choose a bike for bikepacking, which walks you through the key considerations when picking the right model.
Affordable bikepacking gear setups
More often than not, you can start with using what you already have. You don't need the fanciest seatpost bag. You can install a bike rack and attach your existing backpack onto it. If time permits, you can even convert an old backpack into a seat pack by removing unnecessary straps and padding and then creating attachment points using webbing or existing buckles. Similarly, you can use dry bags for carrying some of your bikepacking gear and use bungee cords or straps to attach it to your handlebars. Another simple handlebar storage approach involves wrapping gear in your tarp or bivvy bag and securing it with straps.
Frame bags are valuable for bikepacking storage as they help with centralising weight and maintaining bike handling. You can always make your own frame bag for relatively cheap. You might need basic sewing skills though… X-Pac fabric provides excellent durability, while YKK waterproof zippers ensure reliable closure. You can create a mock up by using cardboard to ensure precise fitting onto your frame. The best part about creating your own frame bag? You get to design it exactly as you please.
If you're an outdoor enthusiast, you probably already own suitable gear. You might just need some minor adaptations. Backpacking sleep systems translate directly to bikepacking. Your existing ultralight quilts, sleeping pads, and tents can work excellently when properly packed. If you're a keen climber, you can wash your chalk bag and potentially use it as a food pouch. Perhaps stock your food in plastic bags if you plan to do this, however…
The clothing you already have will, more often than not, work well with proper layering strategies. Focus on moisture-wicking base layers and wind-resistant outer layers rather than expensive cycling-specific items.
To make sure nothing gets overlooked, check out our complete bikepacking gear checklist.
Budget friendly sleep systems for bikepacking
While comfortable sleep remains crucial, expensive systems aren't mandatory. Most lightweight hiking shelters adapt well to bikepacking. Just come up with some packing strategies to secure it well to the bike. Ultralight backpacking tents often pack smaller than bikepacking-specific models, making them ideal for handlebar. If space allows, you can even carry your hiking poles, fold them up, store them in your frame bag and use them to hold your tarp up! Then, just bivvy under it. (For more detailed tips, take a look at our guide on how to pack bikepacking bags and where to place different items for the best balance and accessibility.
As for a sleeping pad, closed-cell foam pads offer reliable insulation and puncture resistance at minimal cost and weight.
When choosing the optimal sleeping bag for your adventure, look for store-brand options at major retailers as they might be good value for money. Synthetic insulation costs less than down and it maintains its performance in wet conditions.
As for budget-friendly tents, check out online options for generic ultralight tents. Your shelter will dictate your rest and recovery overnight, so do check the reviews and look for something with mostly positive reviews than the cheapest available option. Weight is everything here – the lighter the tent, the less you have to carry…
Bikepacking meals and cooking on a budget
Food costs can escalate quickly, but as with most things, planning ahead can keep expenses reasonable. Simple base ingredients like pasta, rice, and potatoes provide filling foundations for varied meals. You can mix in some peanut butter, store bought pesto or leftover condiments that may be left with you from restaurants along the way. That way, you are also combining protein, carbohydrates, and some flavour.
Your cooking system does not need to break the bank. Canister stoves offer simplicity and reliability. You can use a single pot for cooking most camp meals. Basic aluminium pots provide excellent performance at lower cost. Look at options for integrated cup/bowl designs to reduce the number of items that you require to carry while maintaining functionality. Fuel efficiency matters more than how powerful your fuel source is. Use a windscreen around your stove to help with this.
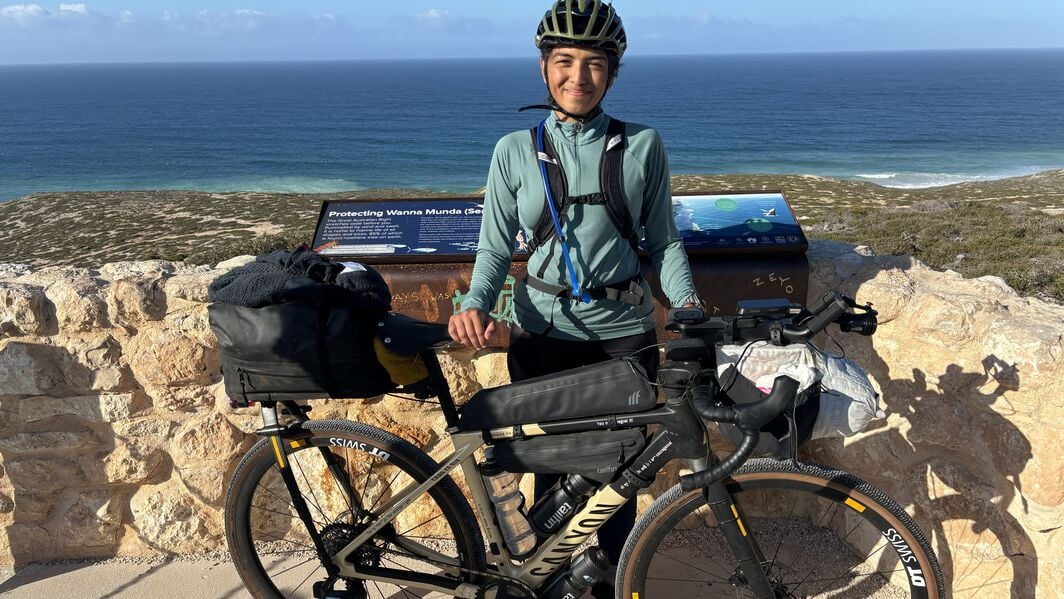
Overpacking is one the most common errors when bikepacking long distancesVedangi Kulkarni

Affordable bikepacking clothing and repair tools
Effective bikepacking clothing focuses on versatility and layering rather than specialised garments. Merino wool base layers provide excellent performance across temperature ranges. Think about the versatility of your clothing. For example, you can use detachable cargo hiking trousers which can double as a pair of shorts.
Your outer layers should prioritise wind and water resistance over breathability. Your spare layers for camp comfort don't need to be cycling-specific, just use whatever is the lightest and most packable thing you own.
Basic bikepacking repair kit checklist
While you don't need a comprehensive set of tools to fix every bike problem imaginable, you do need basic tools to fix issues on the go. When making a list of essential tools that you should carry, think about how the regional/local factors can influence it.
A multi-tool with a chain breaker can handle most needs. Tyre repair supplies including patches, levers, and pumps can help you in case of punctures. That being said, spare tubes will prove faster and more efficient at times than patching. Carry loads of zip ties and wrap duct tape around the seatpost or frame for any emergency repairs. Look for which brake pads your bike uses and take a spare with you. Same with a derailleur hanger.
For a deeper dive into bike care and repair, check out our complete bike maintenance guide, which covers everything in detail so you can stay prepared on the road.
Smart route planning to keep costs down
Your route selection will not only affect your experience but also your trip cost. Established routes provide reliable infrastructure and resource information. For example, if your route isn’t quite in the wilderness and has cheap hostels along the way, then you don’t have to worry about buying or carrying camping gear.
Wild camping opportunities will reduce accommodation costs. Before you opt for that, though, check whether you're allowed to do so in the region. Use apps like iOverlander for finding campsites and getting relevant information about them ahead of time. Community guidelines and suggestions are a great way to prepare for your adventure.
Another hack for keeping accommodation costs down is using apps like Warmshowers to find cycling-friendly folks who will not only have local knowledge but also will have “been there, done that” to give relevant advice about your adventure. Especially while you’re out on a solo adventure, there’s nothing quite like being invited into a loving home where the people understand your needs.
Don't overburden yourself with all the food and water from one resupply point. Gauge how much you will need to carry until the next resupply and whether you have the space for that and buy accordingly.
All in all, when it comes to planning your journey, our guide on how to map out a bikepacking route will help you choose the best paths, distances, and logistics for your adventure.

Bikepacking gear tips and common mistakes to avoid
The goal is to maximise enjoyment by having a safe and efficient ride. You don't need expensive gear to do that. You just need to be better prepared and avoid some common mistakes.
Overpacking is one the most common errors when bikepacking long distances. You really don't need to carry your kitchen sink. Excessive bikepacking gear can create cascading problems throughout your adventure. You will climb slower and fatigue faster. Also, bike handling suffers with poor weight distribution. Packing complexity increases with more items, consuming valuable time and energy. You don’t want weight distribution to be off. A rear heavy setup on a fast downhill can be wobbly. Not to mention it will wear your tyres quicker. You can prevent this by testing your setup before your trip.
Secure the load on your bike appropriately to prevent losing items to rough sections of the route. For this, you can use compression straps, Voile straps or even bungee cords. Weight distribution of the load on your bike affects bike handling more than total weight. You can store your camping gear in your handlebar pack, your spares, tools and electronics in the frame bag, clothing and outerwear in the rear bag. This way, everything is evenly distributed.
Final tips to keep rolling on a budget bikepacking trip
A successful long distance bikepacking trip is a result of good preparation, realistic expectations and a bucket load of creativity. You don't need the best gear on the market for everything, you just need to use your imagination. Be flexible with your plans and adapt according to changing circumstances. If you're just getting into bikepacking, remember that there is a huge community of bikepackers out there. You can ask for recommendations or sometimes even ask to borrow any bits of gear that you want to try before buying it yourself. This will allow you to upgrade your gear based on actual experience.
Bikepacking doesn’t have to be expensive or fancy. Do it your way. Use what you already have. That, in itself, will be a very interesting story to tell later.
Discover our Gravel Bikes
Did this article help?
Thank you for your feedback
-
 About the author
Vedangi Kulkarni
Discover the inspiring story of Vedangi Kulkarni, the youngest woman to cycle around the world solo and unsupported. This adventure-loving endurance athlete, public speaker, and writer is also a business owner and expedition manager. When she's not exploring the world, she's diving into philosophical and nature writing books or researching the Arctic.


